Kamin's Corner

Microsoft provides a free version of their Windows Server 2019 operating system called Hyper-V Server 2019. It's essentially a version of Server Core stripped down to only being able to run the Hyper-V role, as a lightweight hypervisor. But with some tooling, we can coax it to run a GUI with enough to run most Win32 applications – and use it as a somewhat lightweight, free version of Windows.

Installation

The first step is to install Hyper-V server. If you've installed Windows in the past, the setup process should be familiar, minus the product key portion of course.

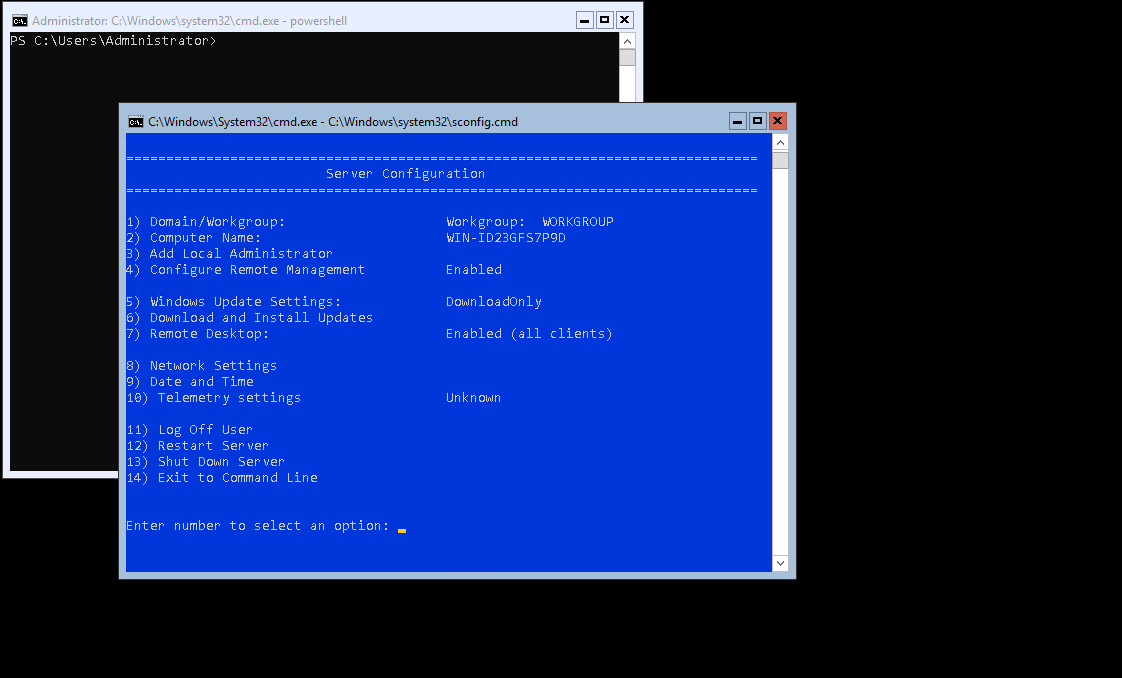
Post-install, we'll be dropped to a command prompt, with sconfig open ready to configure the system, similar to a fresh Server Core install. At this point, I'd recommend enabling Remote Desktop and connecting to the machine that way, so that we can cut and paste text into the prompt.

Sconfig

Initial Steps

The first thing we need to do is enable the App Compatibility Feature on Demand (FOD). This enables compatibility with some desktop programs on Server Core without needing to install the full desktop experience. Fortunately, it's available here as well on Hyper-V Server and will get us some of the essentials we need like explorer.exe and mmc.exe.

To do so, open up a Powershell prompt (you can do so by running powershell from the command prompt), and run the following command:

Add-WindowsCapability -Online -Name ServerCore.AppCompatibility~~~~0.0.1.0

Once that's done, reboot the system and you'll now be able to open up Explorer and a few other familiar tools. But we're not quite there yet – we want the system to log on to a desktop, instead of the barebones command prompt. For that, we'll need to make some registry edits.

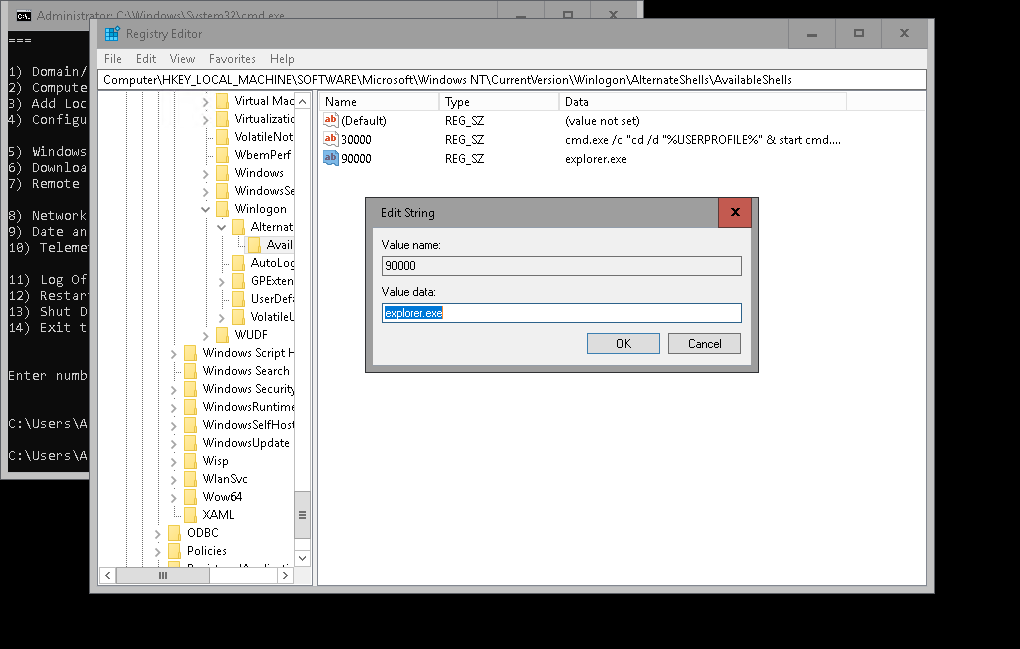
Open up regedit and browse to HKLM\Software\Microsoft\Windows NT\CurrentVersion\Winlogon\AlternateShells\AvailableShells. This key lists what shell Hyper-V server will load on logon. The default with value 30000 is to load cmd.exe like we've seen. We need to add a string with a higher number to load the shell that we want – in this case explorer.exe.

You'll notice that if you try and do so now, you'll be stopped by an error message, like shown below.

We need to take ownership of the AvailableShells key before we can make any edits. Right click on AvailableShells in the sidebar, select Permissions, and then click Advanced.

At the top, you'll see it says Owner: TrustedInstaller. Click Change, type Administrator in the field, and click Check Names. It should populate with the current Administrator user, as shown below.

Click OK, and before we close out of this, select Administrators under the Permission Entries: list below, click Edit, and make sure to check Full Control. Close out of all the permissions dialog boxes and we should now have the ability to create new objects in this key.

Right click anywhere on the right pane, and select New > String Value. Give it a number higher than the default 30000 (in this case I chose 90000). Double click it and under Value data, type in explorer.exe.

Editing the registry

There's no need to restart after this. Go ahead and log out and log back in, and you should be greeted with the familiar Windows desktop.

Adding the Start Menu back in

It's not quite the full desktop experience though. Most notably, the start menu does not work at all. We can work around this by installing a 3rd party program called Open-Shell.

Open a Powershell window (you can do this by hitting Meta+R and running powershell) and enter in the following command:

wget https://github.com/Open-Shell/Open-Shell-Menu/releases/download/v4.4.190/OpenShellSetup_4_4_190.exe -outfile OpenShell.exe

Then type OpenShell.exe and run the installer. If you don't want the Explorer tweaks, make sure to deselect that feature before you proceed.

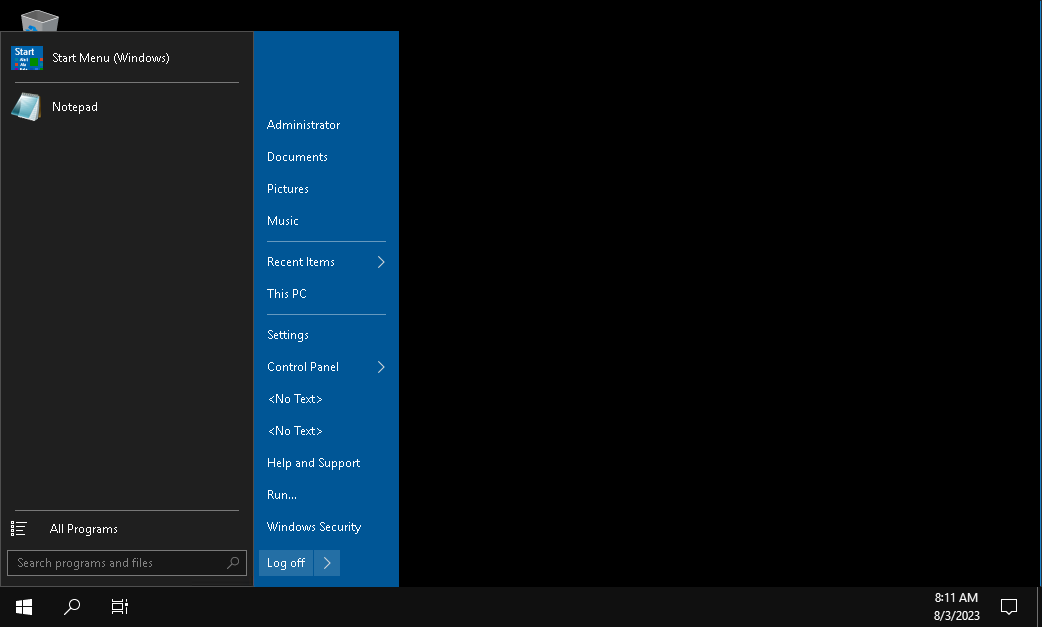
Now, when you click the Start Menu, it'll bring up the Open-Shell settings window. Make the changes you want, and you'll now have a classic, but fully functional Start Menu.

Start Menu

Installing a browser

If we want to be able to really use this as a desktop, we'll need a browser. The easiest one that I found I was able to get up and running was Vivaldi. Open up your Powershell window again and run the following command:

wget https://downloads.vivaldi.com/stable/Vivaldi.6.1.3035.257.x64.exe -outfile VivaldiSetup.exe

and then same as with Open-Shell, run VivaldiSetup.exe (be sure to select Advanced and in the drop down select Install for all users). After a short install, we'll now have a full web browser available to us.

Adding Users

We're still running as the default Administrator user, so you may want to create your own user profile instead. The usual Control Panel and Settings aren't available to us here, but we can create one by opening mmc.exe, clicking File > Add/Remove Snap In..., selecting Local Users and Groups in the left pane, and clicking Add >. Select Local Computer in the pop up dialog and hit Finish. You may get an error message that MMC could not initialize the snap-in, but I was just able to hit OK and it worked anyway. In the left pane, select Local Users and Groups, and then browse to Users. In the right pane, right click and select New User.... Fill out the fields as you'd like and click Create. The new user has been created, and you'll now be able to log out and log back in as your new user.

Final thoughts and additional steps

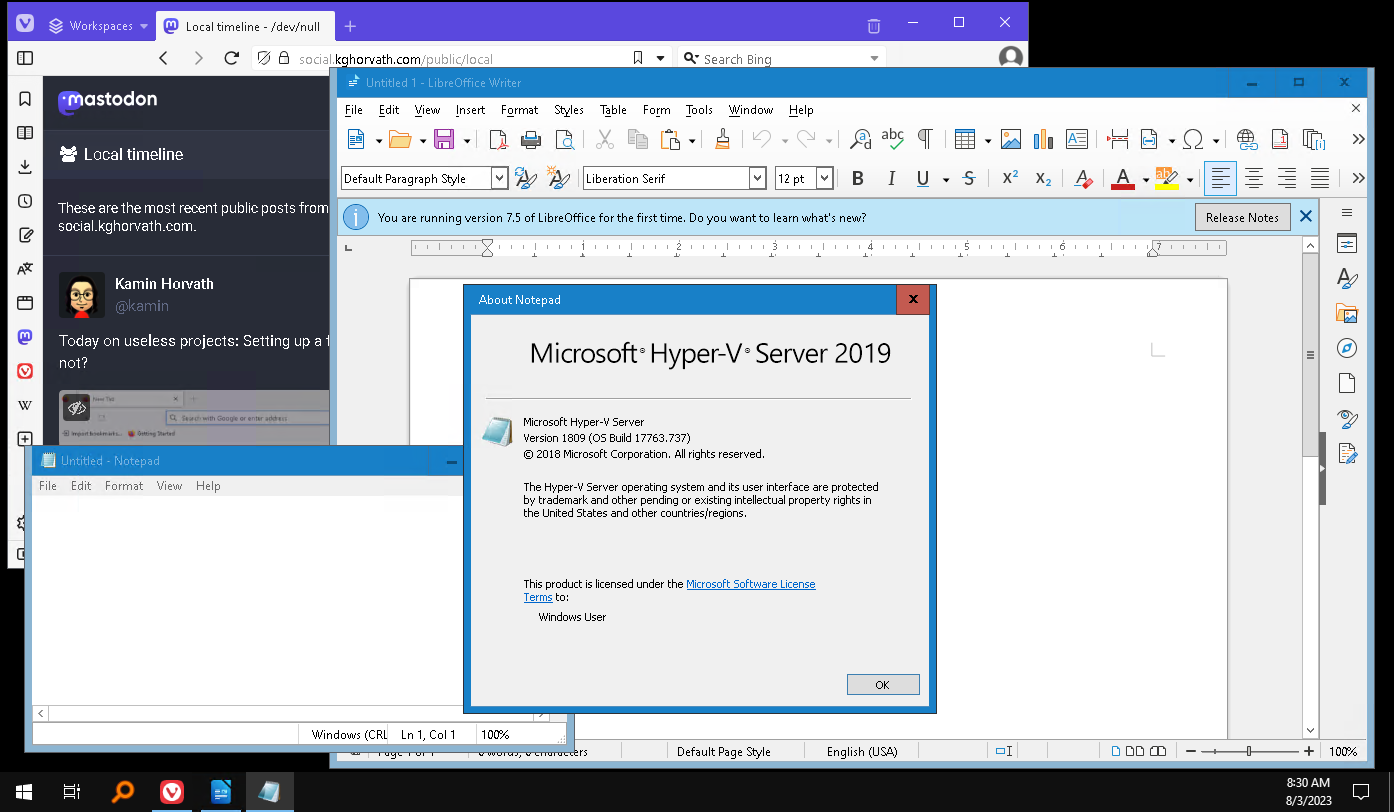
From here out, you should be fully equipped with a working desktop and a browser which will allow you to download and install whatever additional programs you'd like. Since our desktop is still missing some core functionality, I'd recommend some 3rd party tools like 7-zip to open archives, and Everything for local file search.

But there you have it, a (mostly) fully functional Windows desktop on a free Hyper-V Server 2019 machine. Special thanks to This reply on this Open-Shell issue for discovering the preliminary steps necessary to get this off the ground.

Hyper-V Server desktop

Although the real-time collapse of Twitter and now seemingly Reddit as well has sent shockwaves throughout the social media landscape and the internet as a whole, in a way it's been an enlightening experience for myself.

The sale of Twitter and it's subsequent pandering towards extremists is what pushed me to Mastodon in the first place. Although I initially wanted to find an alternative to what I had, I instead found something much better – a closer-knit community of people with genuine attitudes and more organic and thoughtful discussion of the topics I was interested in. Even though by nature Mastodon, and the Fediverse as a whole, is scattered and distributed by design, the collective community felt much closer than anything I had ever found on Twitter.

I went through the same eye-opening experience when I moved from Reddit to Lemmy. Although I sought something similar to replace the hole left behind by my favorite subreddits, I found communities that seemed much more engaging and informed.

Now as I ponder going through the same process once again with moving from Instagram to Pixelfed, I hope that I once again can find a new social community that is not only engaging, but even enthusiastic to be here. In some ways it's like reliving the earlier days of the internet, when it was more tech-oriented (i.e. nerdy) folks who had a genuine love of the platform as much as the topic itself. I hope that I can once again find that same enthusiasm as I did back then, and as I have now with the Fediverse.

NT4 login screen

In the process of moving over to Fedora as my server OS, I've been exploring how to replicate some of the things I did in Proxmox – one of which is running a sort of legacy “ant farm” network. The core of that network was a Windows NT 4 virtual machine acting as a primary domain controller, serving DNS, WINS, and DHCP to that subnet.

I followed Virtually Fun's guide to setting up NT4 on Proxmox and wanted to see if I could replicate it here. Since both Proxmox and Libvirt in Fedora use QEMU/KVM underneath, I knew it was possible – it was just a matter of replicating the Proxmox configuration in a Libvirt domain XML.

I began by using virt-install to create a basic domain as a template. I ran the following command:

virt-install --virt-type kvm --name winnt4 --cdrom /machines/en_winnt_4.0_svr.iso --os-variant winnt4.0 --disk size=2 --memory 64 --sound sb16 --cpu pentium --network user,model=pcnet

This creates a new domain with a 2GB hard drive, 64MB of RAM, a virtual SoundBlaster 16 sound card, a pentium-equivalent CPU, and an virtual AMD PCNet NIC.

This gets us a running machine, but you may notice that the web viewer isn't available in Cockpit. That's because the new machine only has a SPICE viewer, not a VNC output Cockpit needs.

Run virsh edit winnt4 to drop into the XML editor, and add the following under <devices>:

<graphics type='vnc' port='-1' autoport='yes' listen='127.0.0.1'> <listen type='address' address='127.0.0.1'/> </graphics>

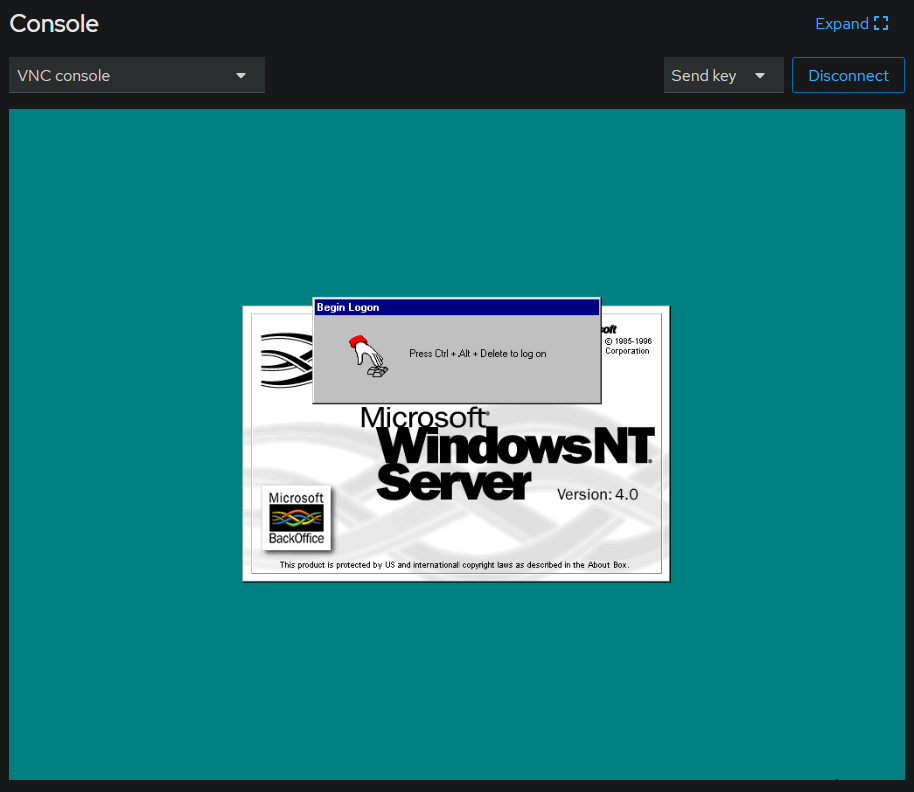
This will create a VNC port that Cockpit can hook into. Save the domain and reboot the VM and we should be able to get some screen output:

From here on out, you should be able to continue on with installation and get up and running with network support. I may go into detail in a future post about some finishing touches, such as installing better mouse and VGA drivers, and enabling ACPI shutdown.

Red Hat announced today that moving forward, the only RHEL source code releases will be for CentOS Stream. This is definitely a disappointing decision and one that might cause me to re-evaluate whether I continue to use RH-derived Linux.

I cut my teeth on Linux with Red Hat Linux 7.2, found in the back of a library book. Since then I've always come back to RHL, and later Fedora and CentOS because not only was it familiar, but I liked Red Hat's model of working with and contributing back to Linux and the open source community.

Sadly, it seems like that era has come to an end. It started with CentOS being moved to upstream Stream releases only, and it looks like now they're taking it a step further by restricting source access, likely to hamper the efforts of projects like Rocky Linux and AlmaLinux that have taken its place.

I worry what will happen next. Will Red Hat/IBM have a heavier hand in the direction that Fedora goes? Will they possibly kill it off completely? Either way, I don't like the way things are headed.